
CS180 Project 5: Fun with Diffusion Models!

Kenny Wang  
SID: 3037341680  
UC Berkeley

Overview

In this project, we have some fun with diffusion models! In Part A, we use the pretrained DeepFloyd model to implement denoising algorithms and generate some cool images. In Part B, we train our very own diffusion model from scratch to generate images from the MNIST digits dataset.


Project 5A: The Power of Diffusion Models!


Part 0: Setup

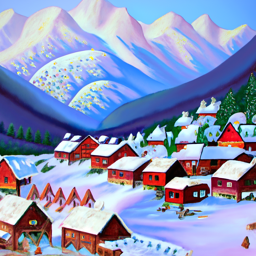
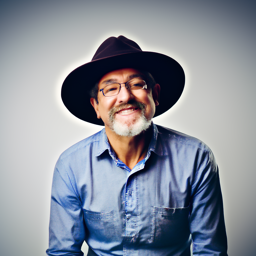
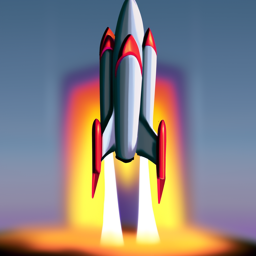
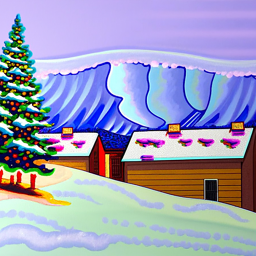
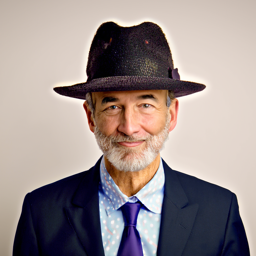
For Part A of this project, we'll be using the DeepFloyd IF diffusion model. Let's try generating some images using the prompts 'an oil painting of a snowy mountain village', 'a man wearing a hat', and 'a rocket ship'. In the second row, num_inference_steps has been increased from 20 to 200 for both stages.


Part 1: Sampling Loops

1.1. Implementing the Forward Process

The first thing we must implement in our journey towards diffusion is the forward process, which adds noise to a clean image.

Campanile

t=250

t=500

t=750

1.2. Classical Denoising

One simple classical method we can use to denoise the images is Gaussian blur filtering, which is basically just a convolution with a Gaussian filter. The results aren't impressive.

Noisy t=250

Noisy t=500

Noisy t=750

Denoised t=250

Denoised t=500

Denoised t=750

1.3. One-Step Denoising

We can now use the model to implement one-step denoising, which produces decent results.

Noisy t=250

Noisy t=500

Noisy t=750

Denoised t=250

Denoised t=500

Denoised t=750

1.4. Iterative Denoising

Diffusion models are designed to denoise iteratively, so let's implement that. Here is the Campanile denoised iteratively.

Noisy t=690

Noisy t=540

Noisy t=390

Noisy t=240

Noisy t=90


Let's compare the iterative denoising with the one-step and Gaussian denoising we tried previously.

Noisy t=690

Gauss

One-Step

Iterative


We observe that the iterative denoising produces the clearest and most detailed image, although it kind of invents new details that weren't present in the original clean image.

1.5. Diffusion Model Sampling

By setting i_start=0 and starting with random noise for our iterative denoising, we can generate totally new images with diffusion! The prompt used is 'a high quality photo'. They are vaguely believable, but sometimes don't really look like anything when you examine them too closely.

Sample 1

Sample 2

Sample 3

Sample 4

Sample 5

1.6. Classifier-Free Guidance (CFG)

To improve image quality (at the expense of image diversity), we can use Classifier-Free Guidance, or CFG. In CFG, we compute both a conditional and an unconditional noise estimate, and build our estimated error off of both of them. Why this works is apparently still up to debate. Here are some samples generated using CFG.

Sample 1 (CFG)

Sample 2 (CFG)

Sample 3 (CFG)

Sample 4 (CFG)

Sample 5 (CFG)

1.7. Image-to-Image Translation

In this part, we'll implement image-to-image translation following the SDEdit algorithm. We take our original clean image, add noise, and then run CFG to generate a realistic image. With different values of i_start, we get images that look variably similar to the originals.

i_start=1

i_start=3

i_start=5

i_start=7

i_start=10

i_start=20

Campanile

i_start=1

i_start=3

i_start=5

i_start=7

i_start=10

i_start=20

Berkeley

i_start=1

i_start=3

i_start=5

i_start=7

i_start=10

i_start=20

Chinatown

1.7.1. Editing Hand-Drawn and Web Images

We can apply this same technique to images from the internet (brainrot) and hand-drawn images (circle Kenny and golden state). I also tried some digital art I drew of Berkeley (wallpaper), which I think turned out the best of them all.

i_start=1

i_start=3

i_start=5

i_start=7

i_start=10

i_start=20

brainrot

i_start=1

i_start=3

i_start=5

i_start=7

i_start=10

i_start=20

circle Kenny

i_start=1

i_start=3

i_start=5

i_start=7

i_start=10

i_start=20

golden state

i_start=1

i_start=3

i_start=5

i_start=7

i_start=10

i_start=20

wallpaper

1.7.2. Inpainting

Campanile

Mask

To Replace

By forcing the image to remain the same except for a masked area, we can fill in an image in the masked area. Here, we generate a new top for the Campanile (which DeepFloyd seems to like to think is a lighthouse).


Let's try with a few other images too.

Shuttle

Mask

To Replace


Berkeley

Mask

To Replace

1.7.3. Text-Conditional Image-to-Image Translation

In our original image-to-image translation, we simply used the prompt 'a high quality image'. Instead, we can change this prompt to something more specific.

i_start=1

i_start=3

i_start=5

i_start=7

i_start=10

i_start=20

Campanile -> 'a rocket ship'

i_start=1

i_start=3

i_start=5

i_start=7

i_start=10

i_start=20

Shuttle -> 'a rocket ship'

i_start=1

i_start=3

i_start=5

i_start=7

i_start=10

i_start=20

Berkeley -> 'an oil painting of a snowy mountain village'

1.8. Visual Anagrams

We can also use the denoiser to do some interesting visual illusions. At each step, by running the model to estimate noise for one prompt, and running the model to estimate noise for a different prompt on the flipped image at the same time, we can make the image look like something different when flipped upside down.

'an oil painting of an old man' + 'an oil painting of people around a campfire'

'an oil painting of a snowy mountain village' + 'an oil painting of people around a campfire'

Using the prompts 'an oil painting of people around a campfire' and 'a photo of the amalfi coast' produces particularly reliable and pretty results.

1.9. Hybrid Images

We can also create hybrid images using a similar technique that look like something different if you squint.

'a lithograph of a skull' + 'a lithograph of waterfalls'

'an oil painting of an old man' + 'a photo of the amalfi coast'

'a photo of a man' + 'a photo of the amalfi coast'


Project 5B: Diffusion Models from Scratch!


Part 1: Training a Single-Step Denoising UNet

In this part, we will implement and train our own diffusion model from scratch on the MNIST digits dataset!

Training a Denoiser

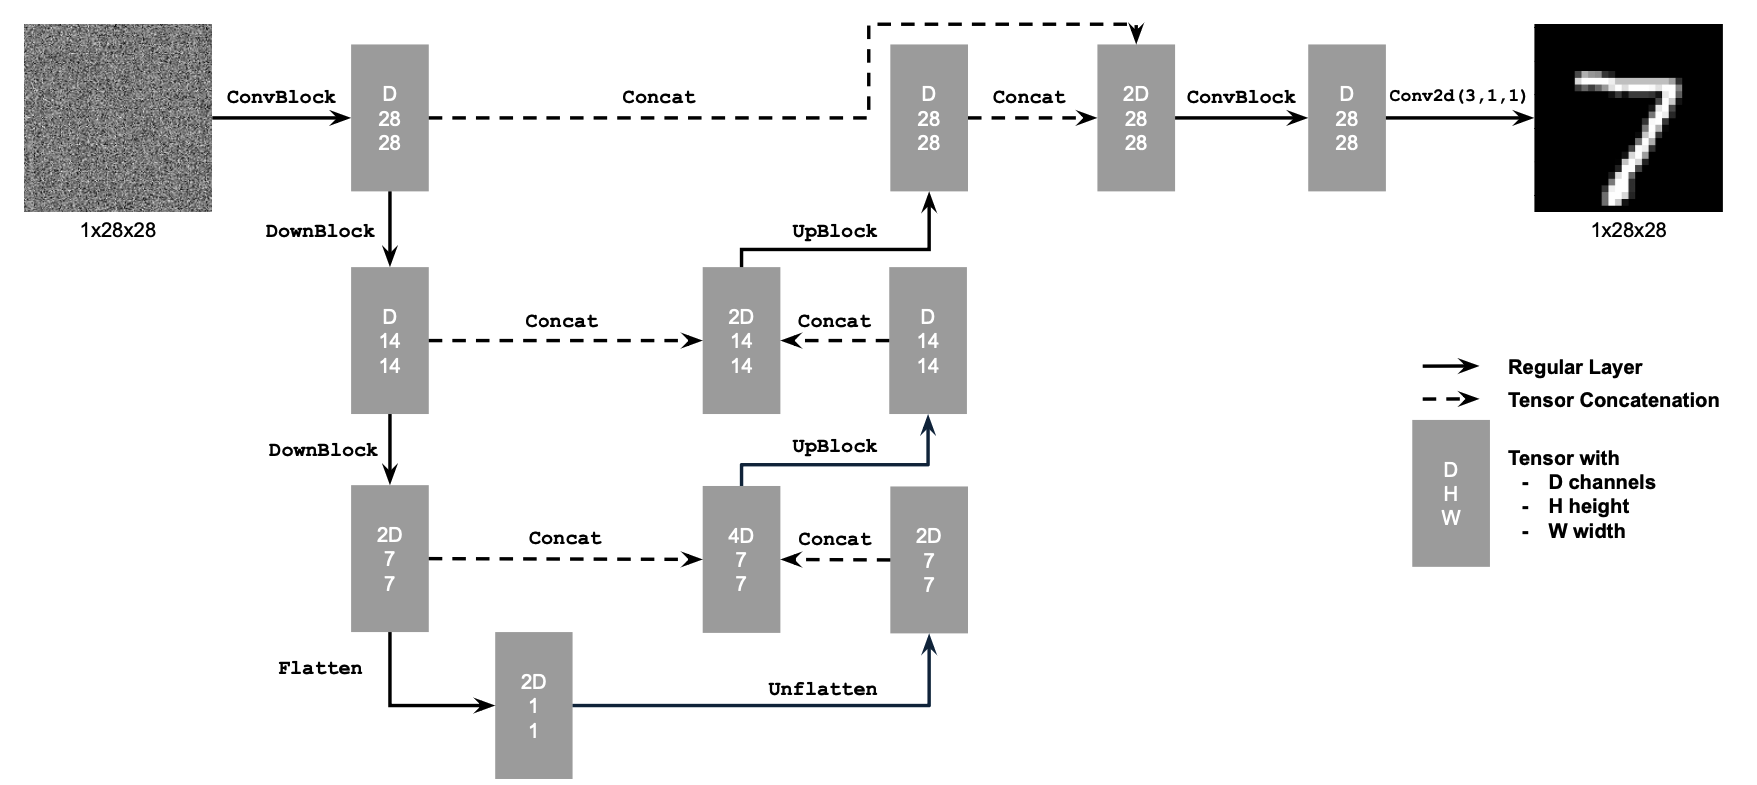
First, let's train a UNet for denoising. It has a few downsampling blocks and upsampling blocks with skip connections.

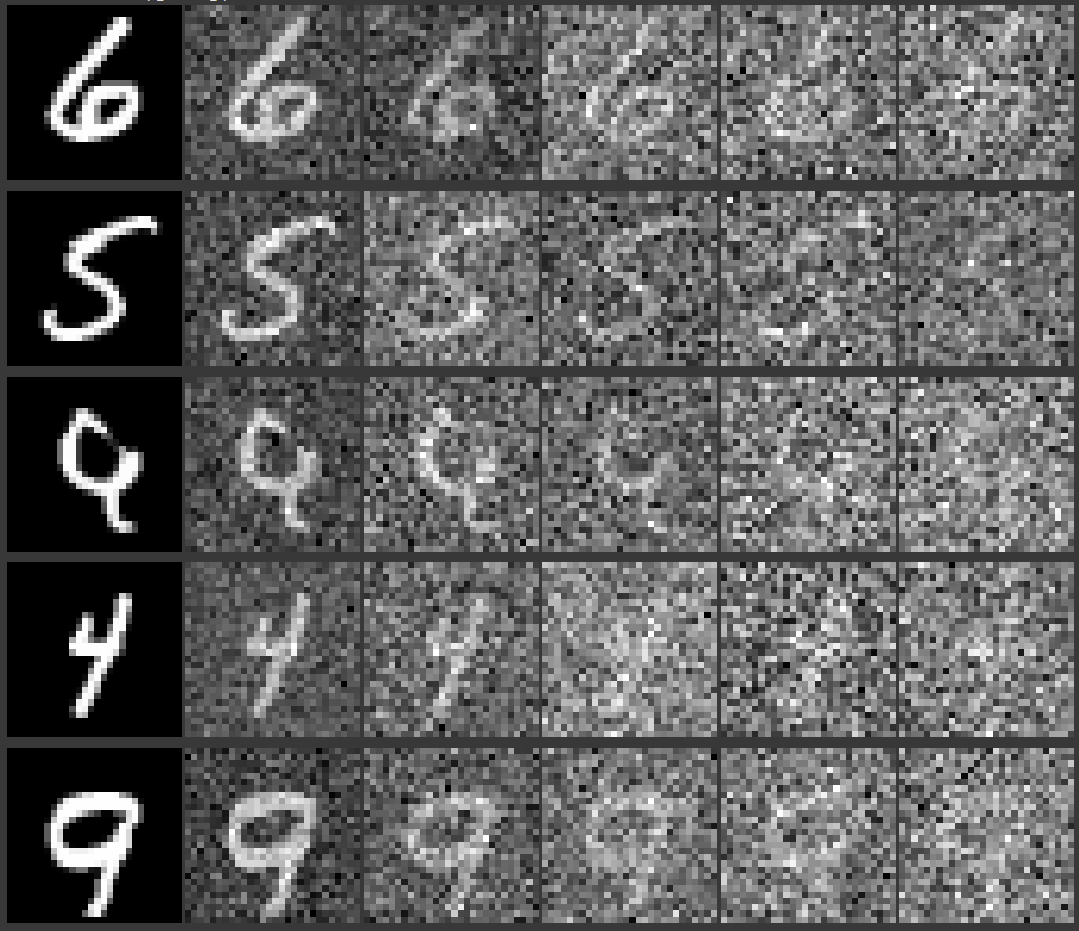
We can generate noisy samples for training at various values of sigma.

Noising with sigma=0.0, 0.2, 0.4, 0.6, 0.8


Training our model with the Adam optimizer with learning rate 1e-4, we get FIXME.

Denoising results for sigma = 0.0, 0.2, 0.4, 0.6, 0.8, 1.0
Part 2: Training a Diffusion Model

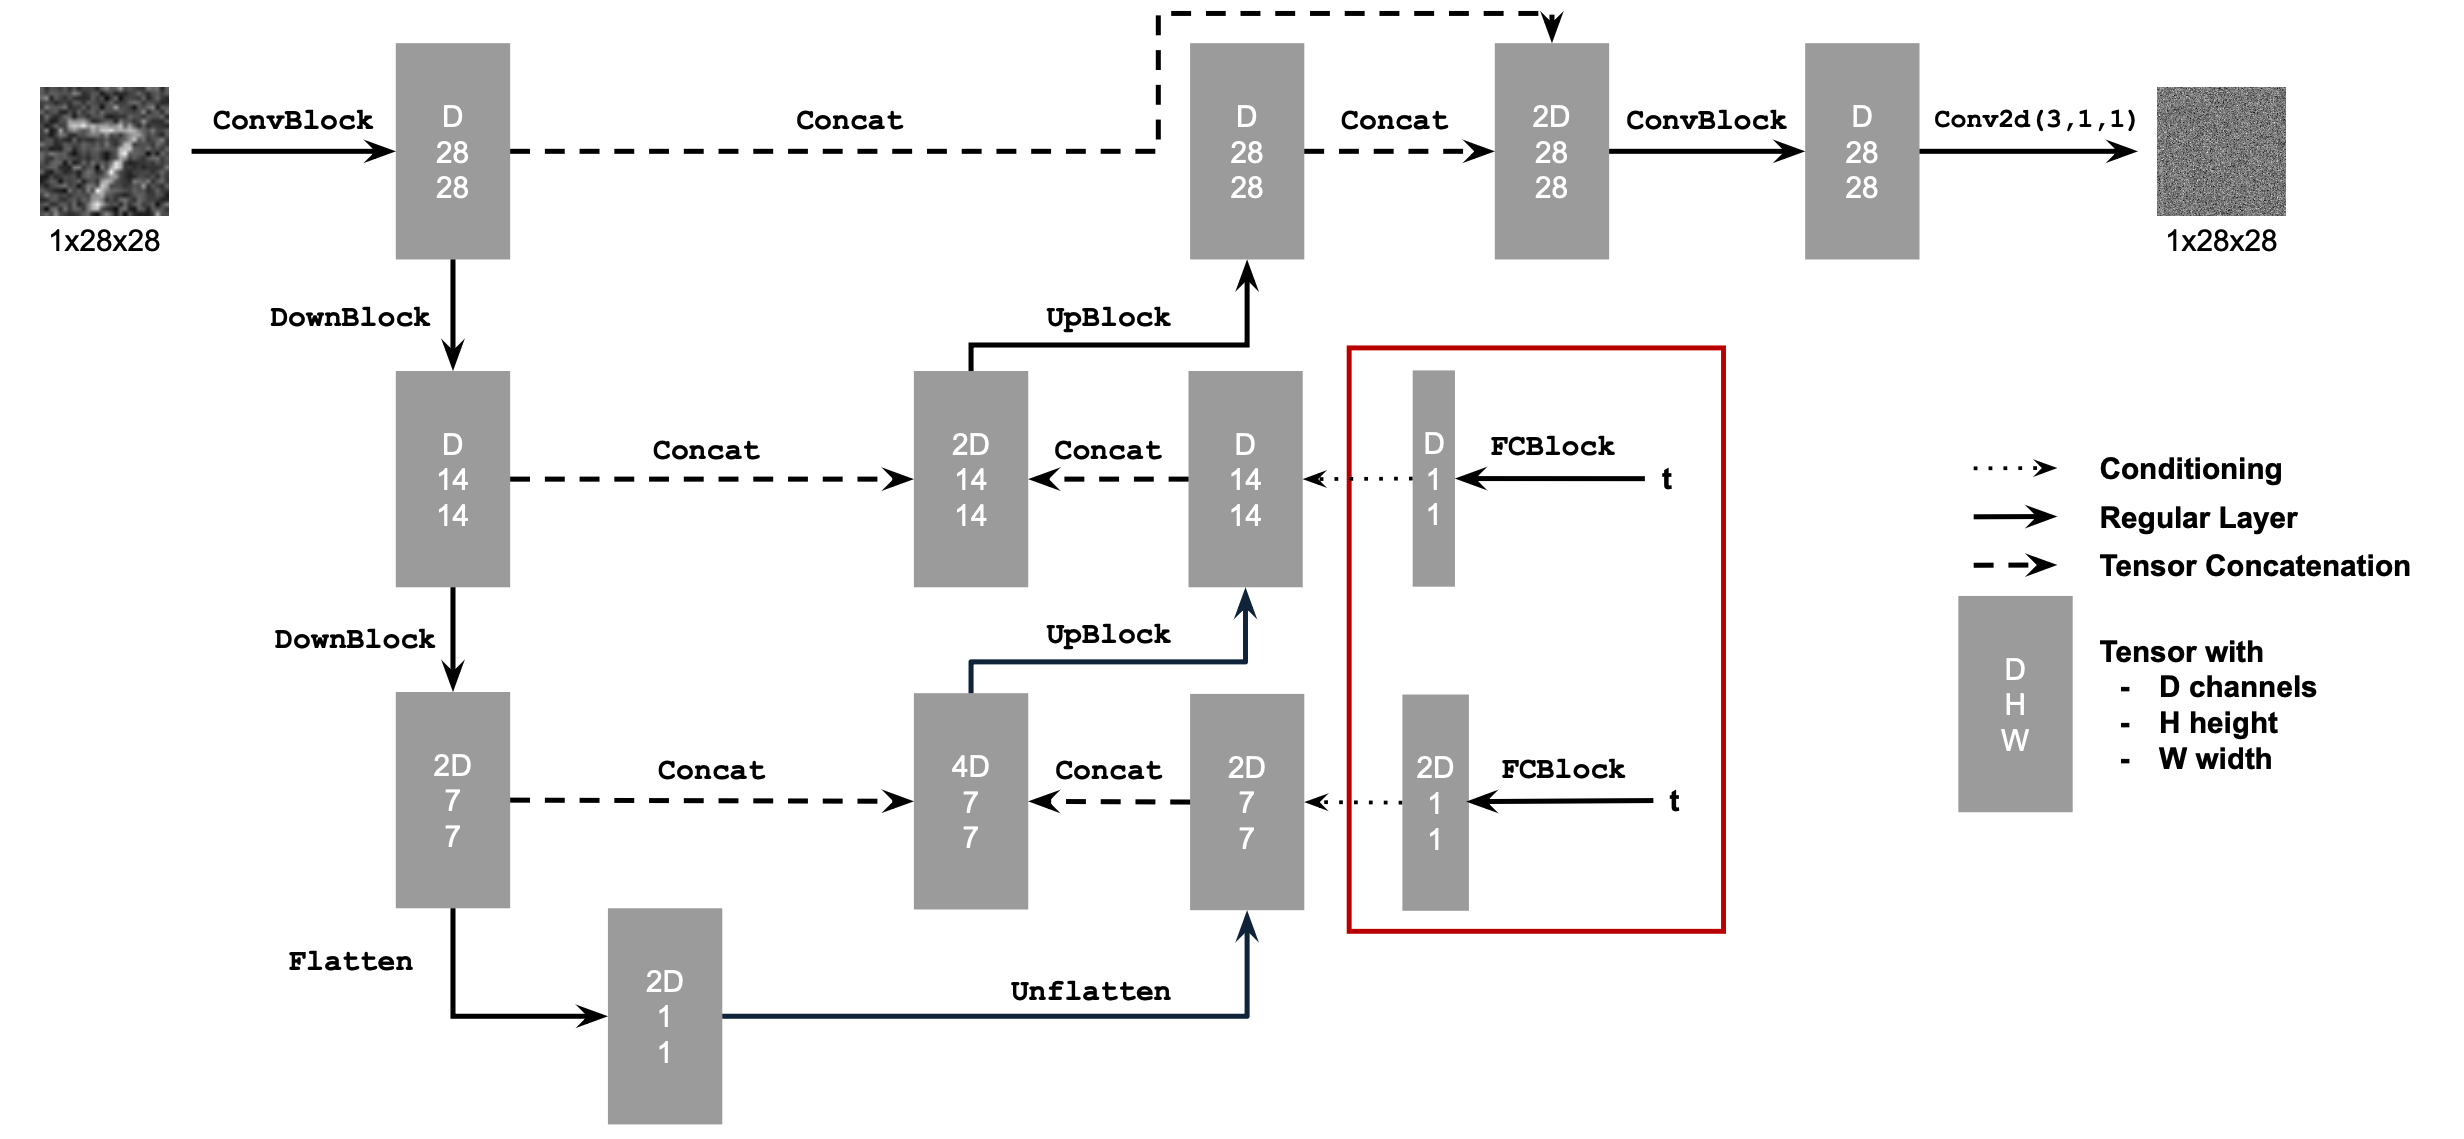
Adding Time-Conditioning to the UNet


To inject scalar t into our UNet model, we modify the model as shown, using fully-connected layers to process t. Note that t is normalized before being fed into the model.


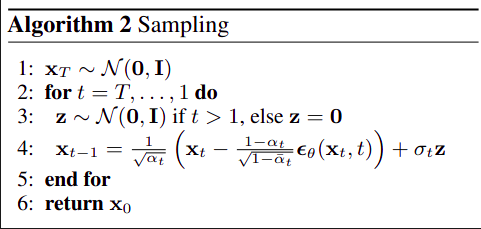
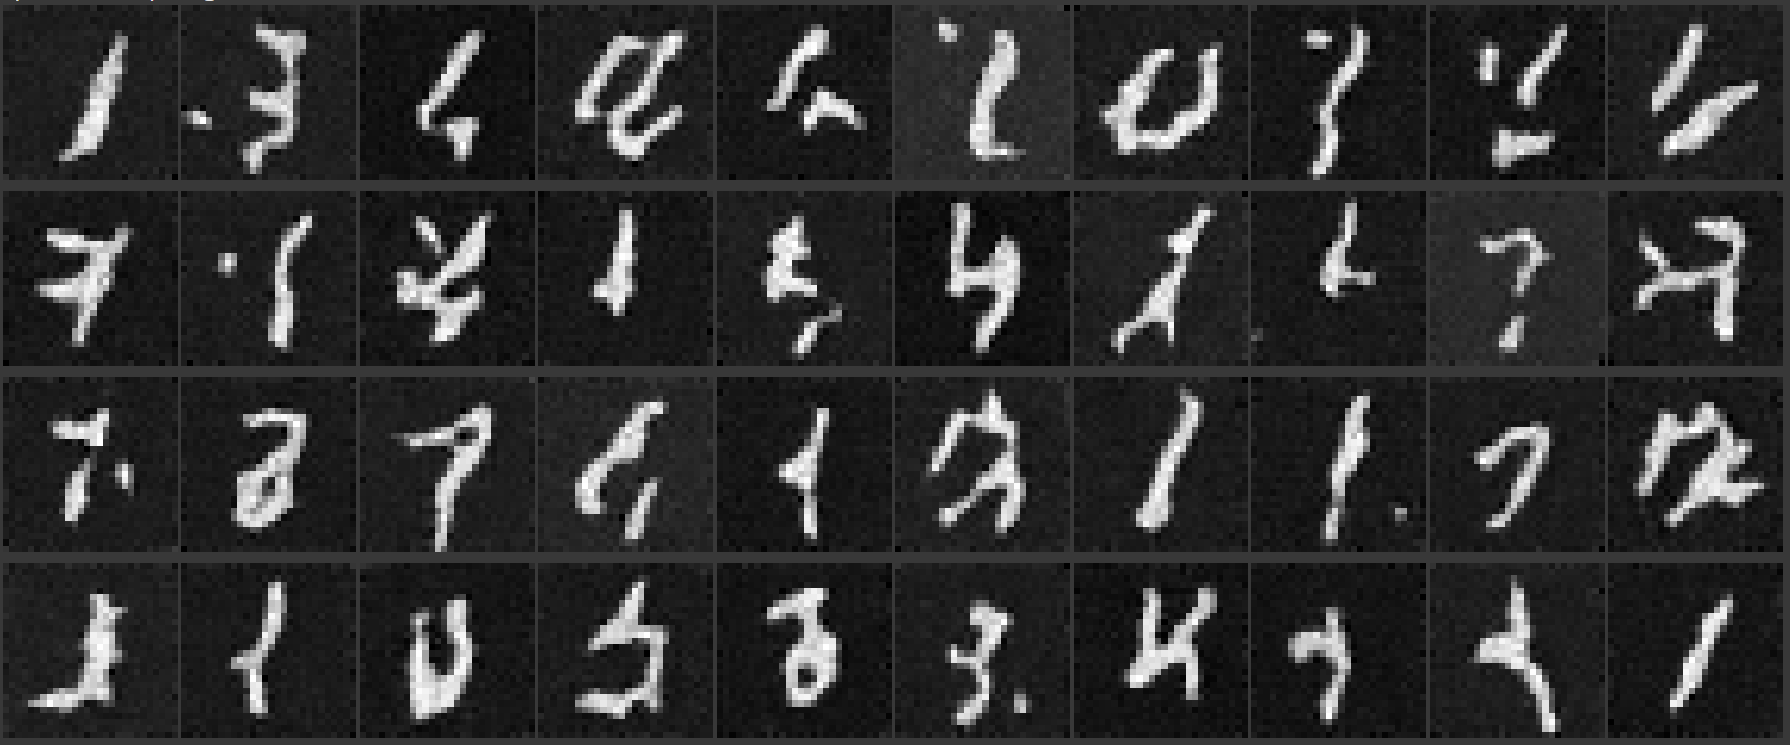
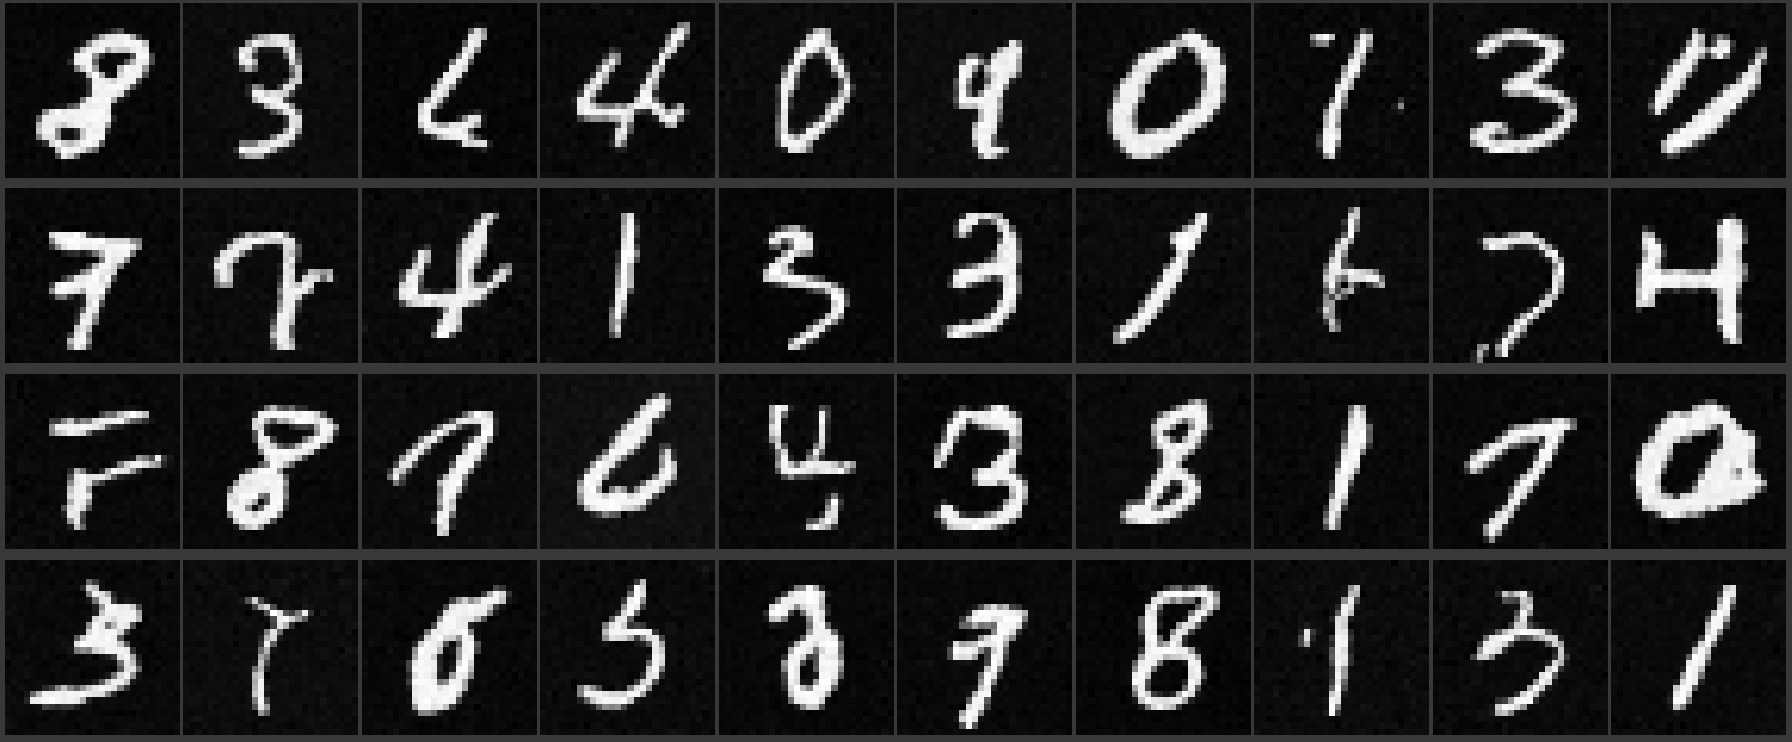
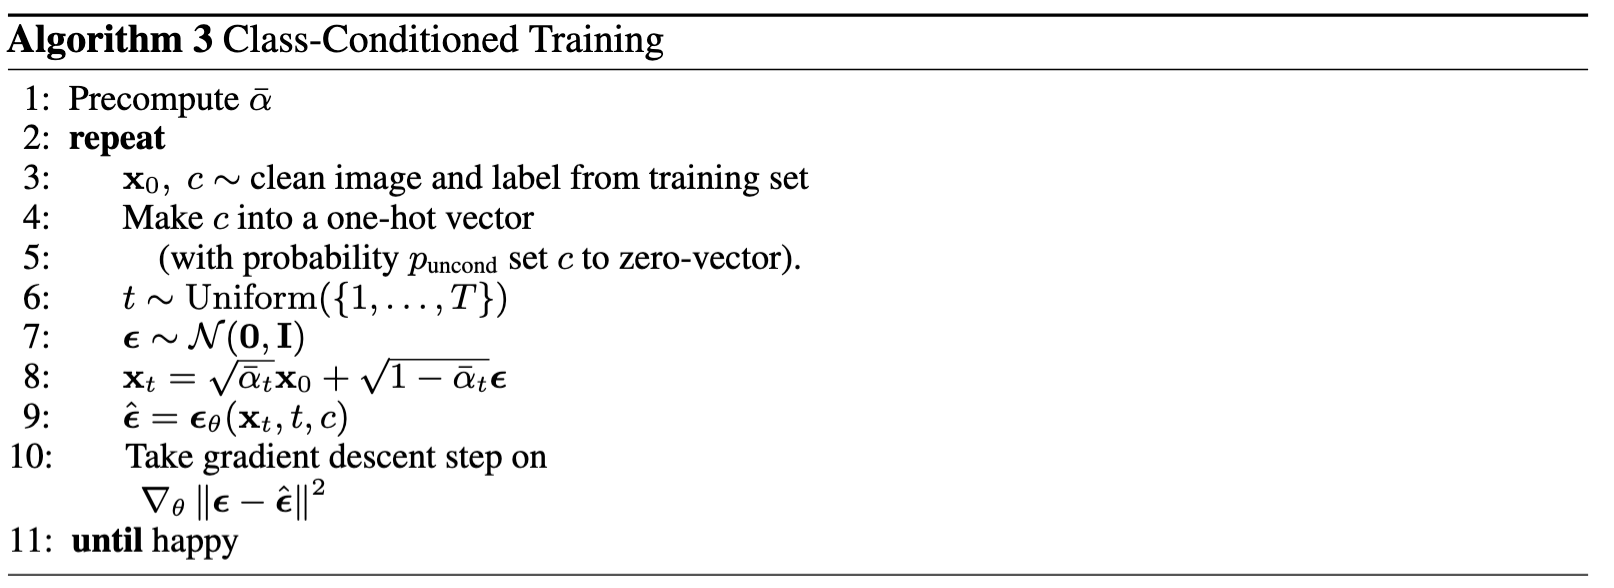
Using these algorithms from the DDPM paper, we can train our diffusion model and sample from it. Here are the sampling results after epochs 1, 5, 10, and 20.

Epoch 1

Epoch 5

Epoch 10

Epoch 15

Epoch 20
Adding Class-Conditioning to the UNet

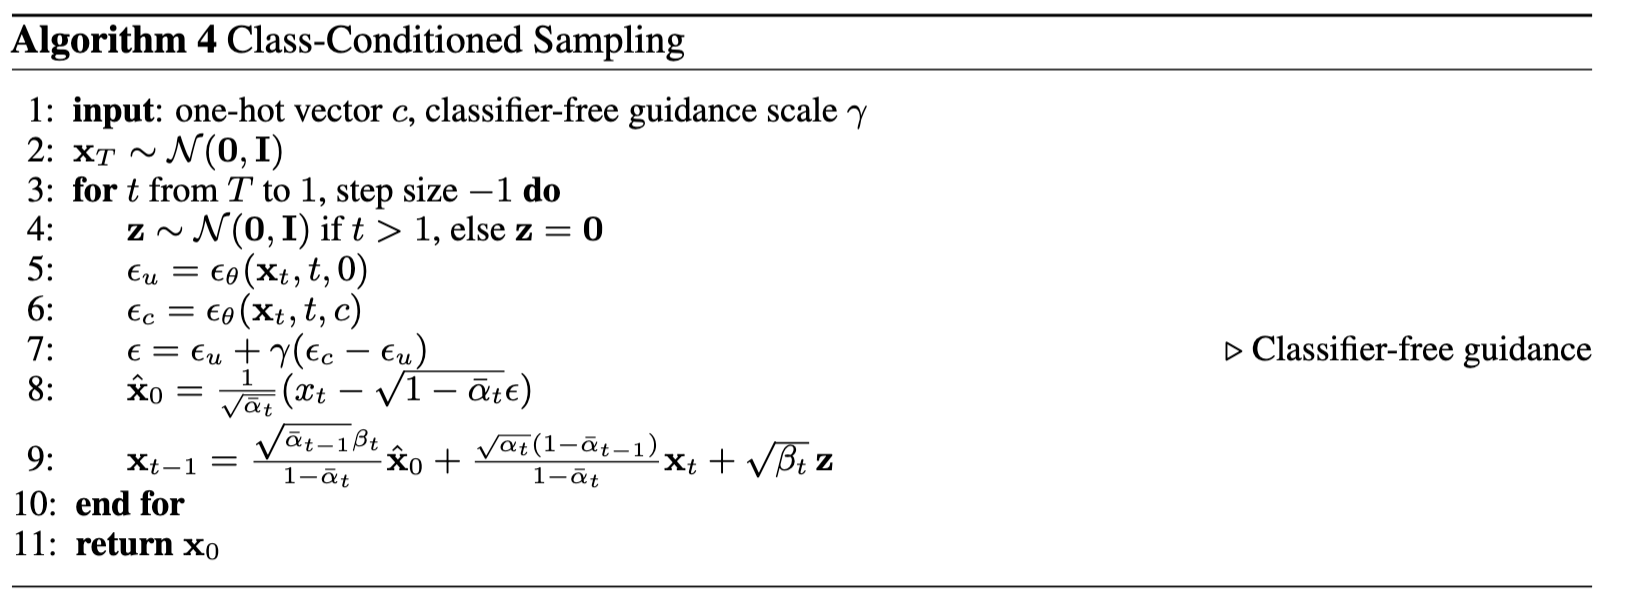
We can condition the UNet on the digit 0-9 to allow us to generate specific digits, and improve the results. We input a one-hot vector encoding class (c) into the model and connect it using some fully-connected layers. However, because we would like our model to still work without being given the class, we will implement dropout for c 10% of the time.


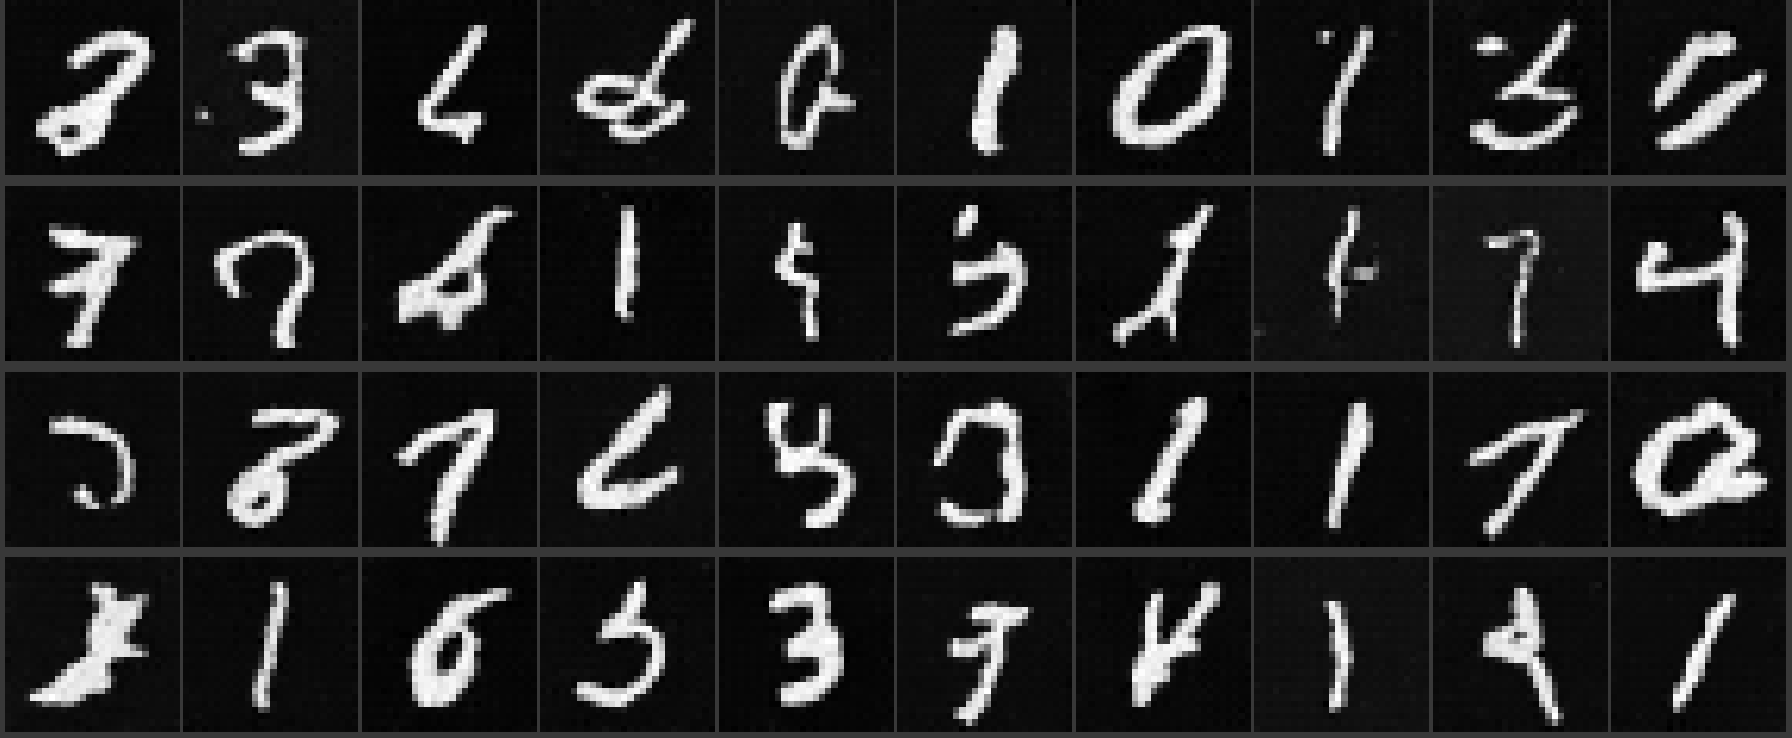
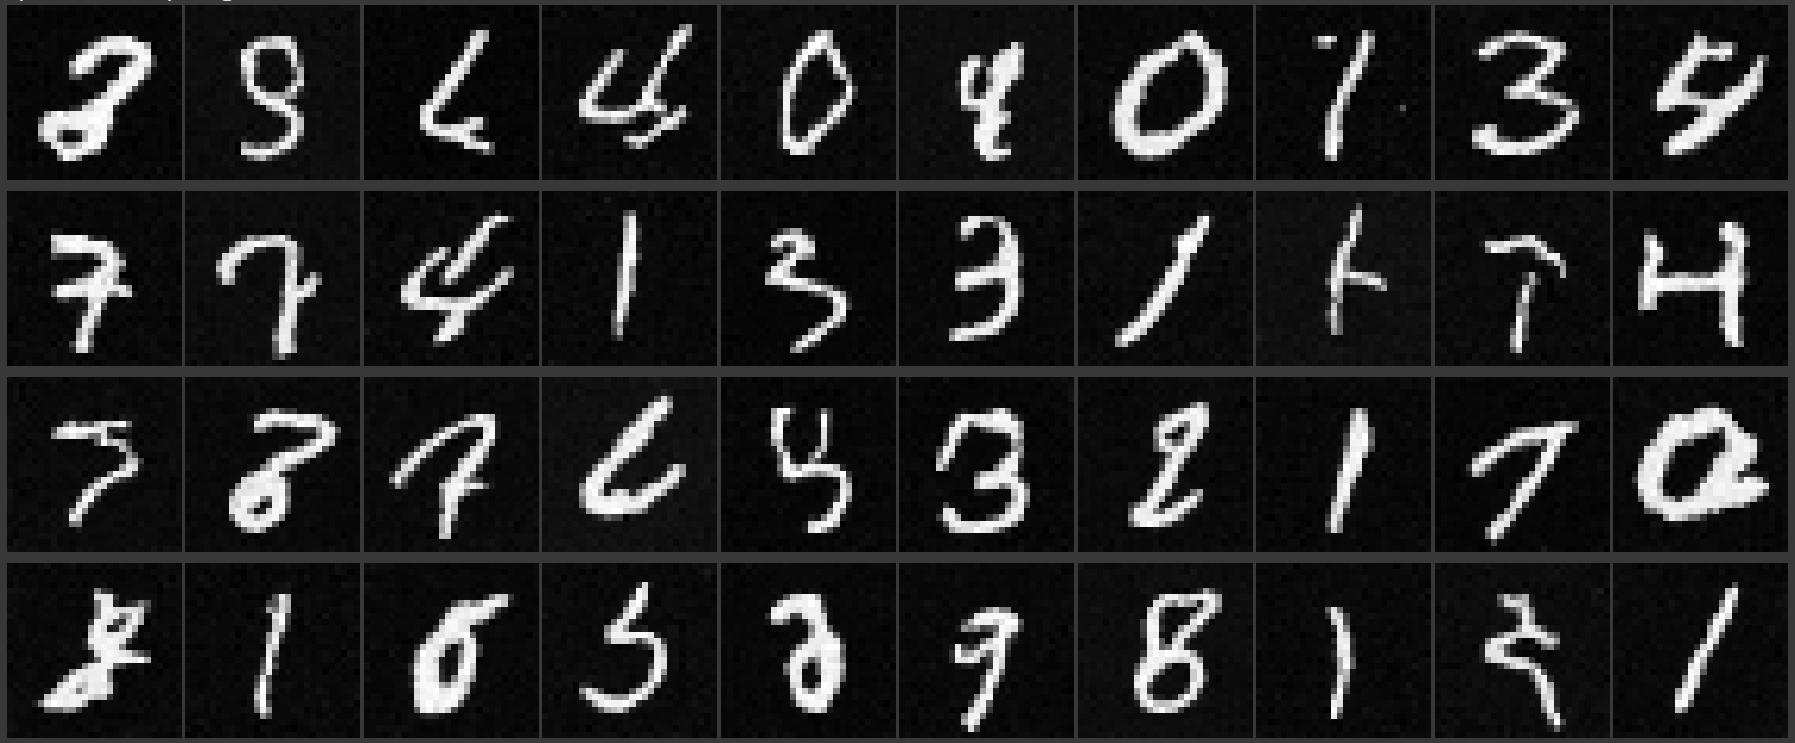
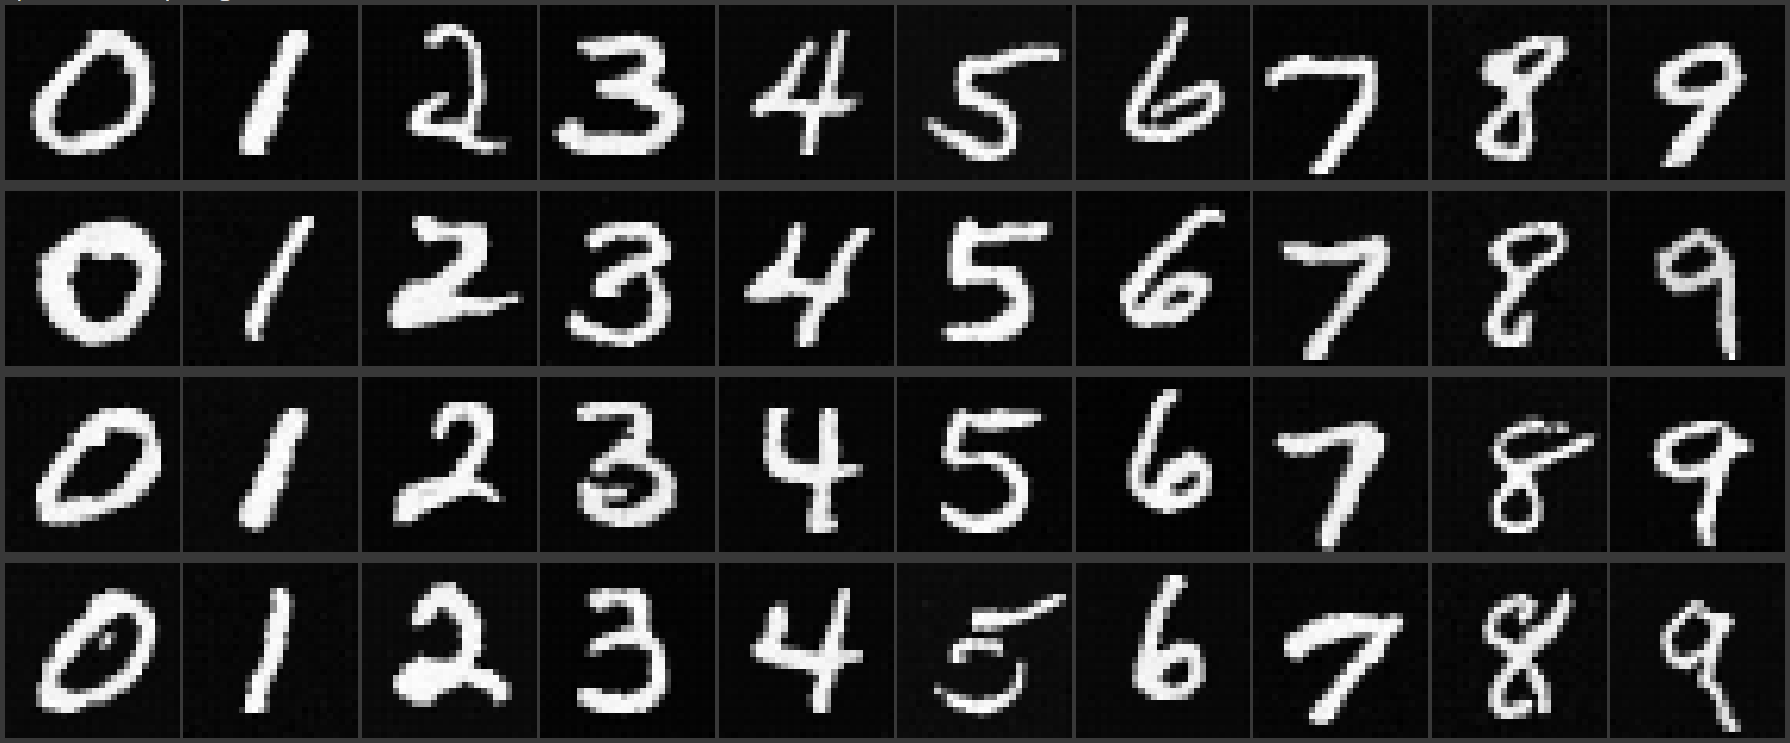
We can use these algorithms to modify our training and sampling code for our class-conditioned model. Shown are sampling results for various epochs of training.

Epoch 1

Epoch 5

Epoch 10

Epoch 15

Epoch 20
It works!

Reflection

Possibly the most challenging solo project I've ever done. Debugging the neural networks in Part B was extremely difficult, as unlike in other code, it's difficult to pinpoint where issues come from in ML. However, I also feel that this is one of the most worthwhile and interesting projects I've ever done. I learned a lot about PyTorch, diffusion models, and machine learning in general.

Acknowledgements

This project is a course project for CS 180. Website template is used with permission from Bill Zheng in the Fall 2023 iteration of the class.